 |
| "Just set it and Forget it..." |
However, with Extranet Collaboration Manager (ExCM) you can use a domain name security policy for anonymous registrations, and literally do just that. Like the legendary salesman and TV marketer Ron Popeil of Ronco has said tens of thousands of times in his TV ads, you can, "Just set it and forget it."
In our example scenario, the organization AW Bikes has just finalized a large contract with ACME Corporation. AW Bikes will be supplying ACME with all the required bikes on location for any new projects. All ACME will need to do is fill out the required form and submit it to AW Bikes, and then they will make sure the required bikes are shipped to the project location.
AW Bikes knows that ACME has projects taking place all over the world with many different project managers who will need access to the form. AW Bikes needs access to the form to be easy and secure, but they do not want to have to add or invite, then approve every new ACME project manager to the extranet site. So they ask PremierPoint Solutions if we might have an easier solution.
Our suggestion is to set up Extranet Collaboration Manager’s anonymous registration feature with auto approval using a domain name policy. Here is how it would work:
ACME can provide the URL for the ACME log in page to its project managers. The Managers can then browse out to the log in page, select Sign Up, and register using their ACME email address. When ExCM sees their ACME email address, it will automatically approve the new user. Once approved, they will have access to the ACME site and access to the form needed to order the bikes for the project they are working on.
If someone browses out to the site and tries to sign up using any other email domain other than ACME’s, then they will automatically be directed to an administrator for approval, so they would not have access unless approved.
You might be saying to yourself, “Wow, this would save so much time for Administrators, not having to approve users or verify that a user is from ACME!” and you would be right! Just as Ron would say, “But wait there’s more!” You can use this feature to auto-approve more than just one domain name. So let’s say ACME also needed any user with an email address using widgets.com on a project, then they can do that also!
Here are the detailed instructions on how to set this up in your environment:
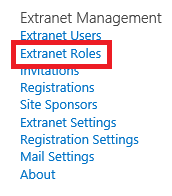
You will first need to log into your Root Site as an Administrator and add a new Role by going to Site Settings/Extranet Roles.
In the top ribbon select Roles then select New Role.

Then name your new role, and click save.

The new role should now be listed in the roles list.

Next (still within the Root Site) you will need to go to Site Settings/Extranet Settings

Click Security policies

Click Security Policies in the top ribbon, then New Policy.
You will then need to add the Role name to the Security Definition section. Once the People Picker has found the Role name, select Domain Name within the Field Type section. Type in the Domain Name Match Expression within the Security Policy Settings section, then click save. Example: acme.com

Log into the site that the domain name users need to access as an Administrator. Select Site Settings, then People and Groups. (In our example, the users need to register for access to: extranet.awbikes.com/sites/acme)

Select the appropriate Security Group. In most cases the Visitors group is selected. Next, select the NEW tab and select Add Users to this group.

Within the “Add people to the group,” type in the full name of the role created previously, and select the name from the list.

Click Share.

You should now see the Role/Policy in the Group.

Once you have your Policy in place, anyone that browses out to the site and registers using the appropriate domain name will be automatically added to the correct Role/Policy, and since you set up the proper security group, they will be granted access to browse out directly to the site and log in.
If the new user tries to sign in at the time of registration or from the approval email, they will be taken to the Root Site. You can add a Web Part to the Root site that will show a directory of all the sites with a link to the sites they have access to. Here is a link with the instructions for setting this feature up:
Extranet Directory Web Part
No comments:
Post a Comment